

Pubic Symphysis Dysfuction (PSD), sometimes referred to as Pelvic Girdle Pain (PGP) occurs when the two halves of the pelvis become misaligned. This happens because the hormones of pregnancy loosen the joint called the pubis symphysis which is normally supported by a dense network of tough tissues called ligaments. Ligaments are not naturally flexible. However the hormone relaxin, which your body releases in significant amounts during pregnancy, softens all tissues including ligaments. Overall, this is a good thing and allows your baby to more easily slip through the bones of the pelvis during birth. That being said, for some women, all that relaxin along with the hormone progesterone can cause a great deal of instability in the joint resulting in pain and inflammation. The pain is most common in the front of the pelvis, but sometimes also occurs in the back of the pelvis on either side of the sacrum (that flat part of the lower back).
Many of the exercises and yoga postures typically done in prenatal yoga or in prenatal exercise classes actually aggravate the pain. But there is hope. The yoga sequence below will not only help you feel better physically, but also help to restore your faith in your body and its ability to do this crazy and amazing thing called pregnancy.
The movements below can not realign the joint or tighten the loosened ligaments. However they help all the same. They help because they stabilize the pelvis by strengthening the muscles that support it. Many of the postures below strengthen the public floor and the core muscles in particular.
For the greatest benefit, print out this blog post and do this yoga sequence daily. If you don’t have enough time to do the entire sequence, simply move through the starred postures. And as any yoga teacher will tell you, LISTEN TO YOUR BODY. If anything feels wrong – stop – and re-adjust. If it still doesn’t feel right, skip it and move onto the next pose.
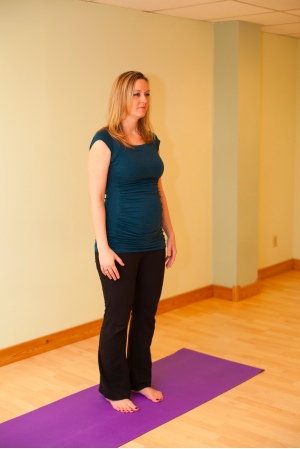
 1. Tadasana : Mountain or Standing Pose
– Engage your pelvic floor muscles and gluts (this means pull them in, up and together). Hold for one complete breath. Repeat 5 times.
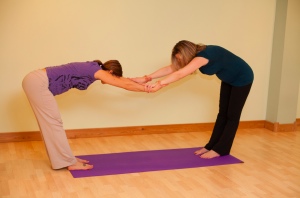
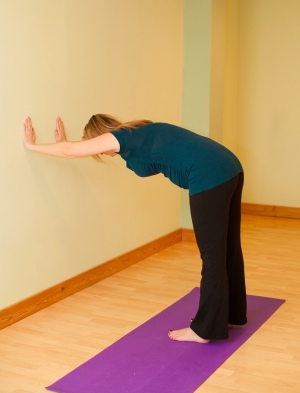
2. Partner Partial Downward Dog Stretch
– Use the weight of the other person to help you stretch your shoulders, back and hamstrings. Hold each others’ wrists and lean back. You can do this on your own by putting your finger tips in the sink, hanging on and leaning back. You can even do this stretch just using a wall – but a kitchen sink is better and having a partner is better still.
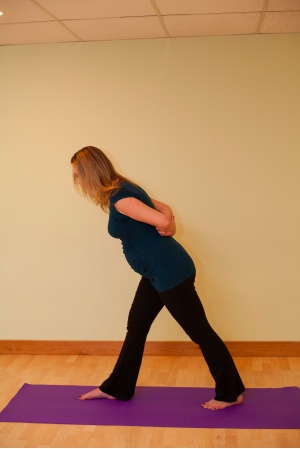
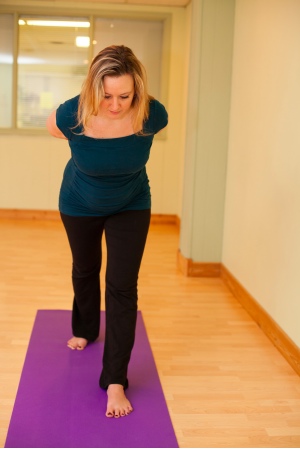
3. Parsvottonasana – Intense Side Stretch
The worse your experience of SPD – the gentler you go in this pose, by keeping your feet about 2-3 feet apart lengthwise and hip width distance apart widthwise. It’s also really really important that you keep your hips and shoulders level with the floor in this pose.
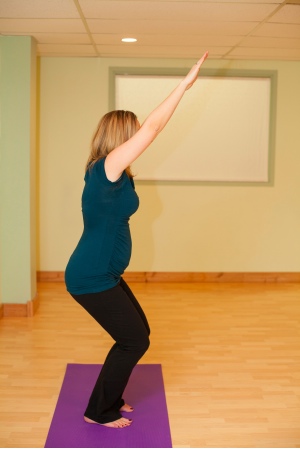
4. Ardha Utkatasana – Chair Pose
– Stand and lower your hips. Keep knees hip width distance apart (don’t let the knees fall inward). Draw the navel slightly in to engage the transverse abdominal muscles and keep your low back in neutral (neither flexed nor rounded). Arms extend up by your ears or straight out in front of you.

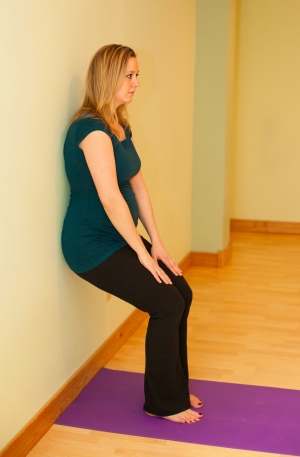
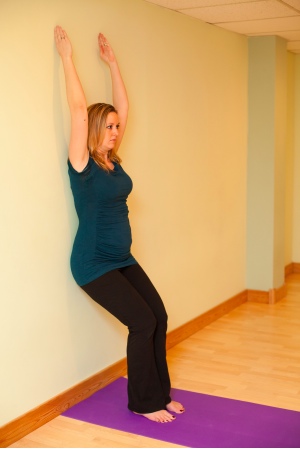
5. Ardha Utkatasana – Chair Pose at Wall with Pelvic Tilts
– Start by standing against a wall with your feet about a foot or two feet away from the wall. Slowly lower your body into chair pose leaning back against the wall. The lower you drop your hips the more intense this posture will become. Make sure you are barefoot so that you are stable in this posture. Then add in the pelvic tilts. To do a pelvic tilt, simply exhale and push the small of your back into the wall, inhale and release your low back (it will lift off the wall) and then repeat. Pelvic tilts are a great way to maintain core and abdominal strength during pregnancy. To increase intensity – raise your arms above your head as you do this posture.
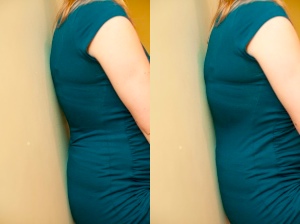
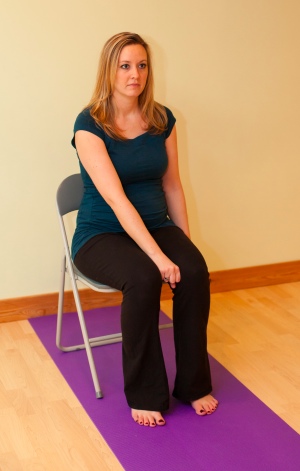
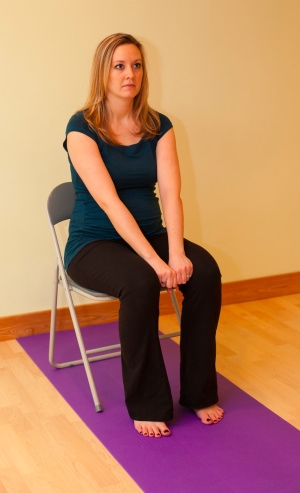
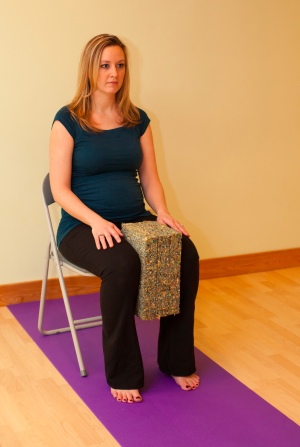
6. Seated Inner Thigh Strengthening Exercise
– Sit down on a chair and place one fist between your knees. Squeeze your thighs together, hold for 5 breaths and then slowly release on an exhale. Repeat with both fists between your knees. If you own a foam yoga block, place it between your knees instead.
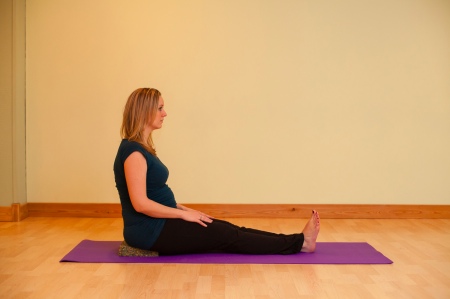
7. Urdhva Mukha Dandasana : Staff or Rod Pose
– This pose may not look like much, but it actually takes a lot of core strength to sit up straight. Place a block or rolled up blanket under your hips to raise them up a bit and help you sit up straight. While in this posture, pull in your naval (giving baby a little hug in the process) and pull up your pelvic floor. Hold for 5 breaths and release. Relax and curl your back and then repeat.
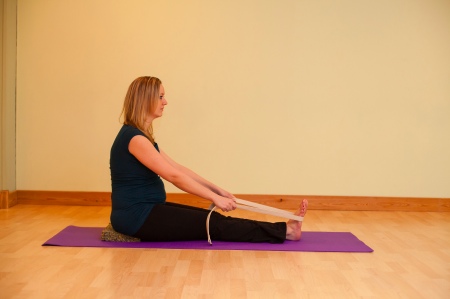
8. Seated Forward Fold
Typically in prenatal yoga, forward folds (as known as forward bends) are done with the legs apart to accommodate the belly and baby. With SPD spreading the legs apart came mean TROUBLE – which you have probably already discovered. To create a bit more space, sit on a yoga block or a rolled up blanket to lift your hips off the ground. Wrap a belt around the balls on your feet and gently bend forward. Keep extending out though yours heels and keep the feet flexed. Press the sit bones down into the block, draw the
sacrum in and lift the whole spine to the crown of the head as you bend. This is a wonderful release for the hamstring muscles.
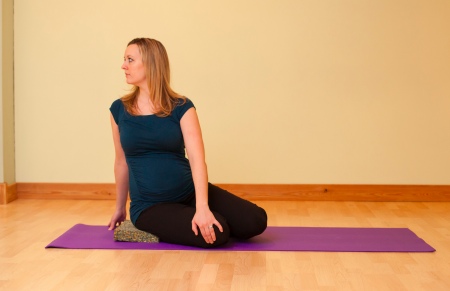
9. Bharadvajasana – Seated Twist
Sit with a folded blanket or yoga block under one hip, bend your knees and let the feet go to the opposite side. Inhale and focus on extending up through the crown of your head, exhale and twist your upper body in the direction of the block and away from your feet. With every inhale, get taller and with each exhalation twist more deeply. Hold for 5 breaths and then repeat on the other side. Alternatively you can do this stretch seated in a chair or on an exercise ball. As a side note – this twist is safe in pregnancy because you are twisting towards an open space and it allows for lots of space and length in the front of the body. It’s also a lovely release for the shoulder blade area, which can become tight as the weight of the baby hunches the whole body forward.

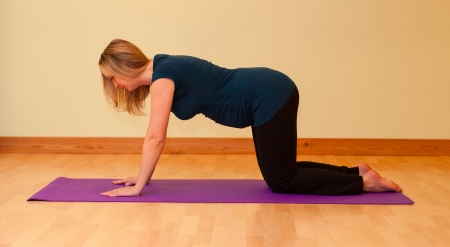
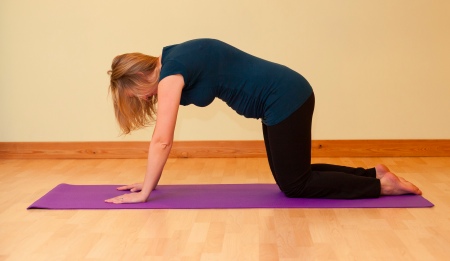
10. Marjaryasana – Cat Stretch
Get down onto your hands and knees. Now level your back so that it is roughly flat. Breathe in and then as you breathe out, squeeze in your pelvic floor muscles and pull your belly button in and up. This curls your back up towards the ceiling. Hold this position between five and 10 seconds, breathing through it. Relax your muscles slowly at the end of hold and return to neutral position. For most pregnant women, arching or swaying the back will be too much for the low back and cause discomfort, so returning to neutral position between curls is generally best. Alternatively this same stretch can be done seated on a chair or on an exercise ball.
 Doing cat stretch seated on a chair or exercise ball at work is a great idea. It is pretty discreet, so you won’t get too many stares and it will really help your back feel better. This posture also takes the weight of your baby off your pelvis and holds it in a stable position.


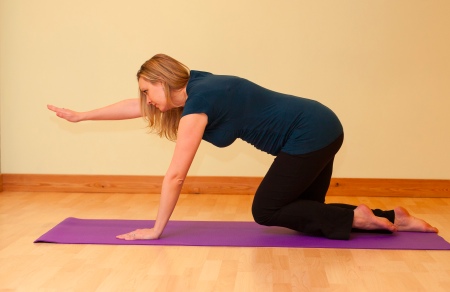
11. Chakravakasana – Adapted SunBird Pose
Get down onto your hands and knees, draw the naval slightly in as though you would giving baby a hug. This helps to stabilize the core of the body. Lift one knee off the ground slightly and stretch the opposite arm out in front of you. Hold for 5 breaths and then repeat on the other side. This position is more challenging that some of the others listed. Please back off if it doesn’t feel right.
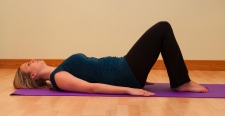
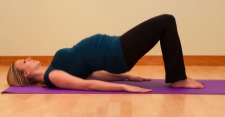
12. Bridge Pose – Setu Bandha Sarvangasana
To begin, lie on your back (don’t worry – we are going to stay there) with your knees bent and your feet hip distance apart on the floor under your knees. Exhale and press the small of your back into the floor. Notice how your tailbone lifts off the ground as you do this. Keeping the knees straight in front of you, hip distance part, lift the tailbone off the floor. Continue to rise, one vertebra at a time until you are resting on your feet and shoulder blades. Remain there for two breaths, and then slowly lower with control as if you were setting down each vertebra from the shoulder to the tailbone one at a time. You will be need to use your abdominal muscles to do this, much is why it’s such a great pose for stabilizing and activating the core muscles.
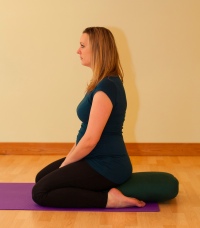
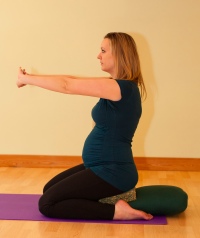
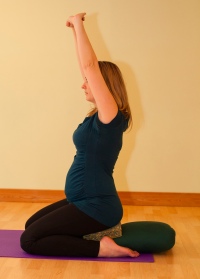
13. Virasana – Hero Pose and Parvatasana in Virasana – Hero Pose with Interlocked Fingers
Start in a kneeling position, then sit down onto a folded blanket, a bolster or foam blocks (see photo below). If you experience discomfort in your knees, adding extra height under your hips will generally make the knees happy. The knees should be hip-width apart. Sit nice and tall, stretching up through the crown of the head and bring the shoulder blades in and together to open up the chest area. On an inhalation, interlock the fingers and lift the arms overhead, keeping the elbows in line with the ears. Release the arms, change the interlock of the fingers and repeat.
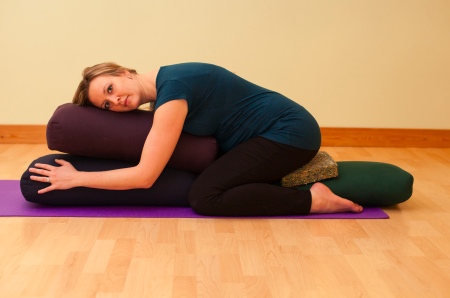
14. Adho Mukha Virasana – Child’s Pose or Down-Facing Hero Pose
For this posture, it’s best to have lots of cushions, bolsters and blankets. It might seem like a lot of trouble, but trust me, it’s definitely worth it. This is one of the most restorative poses out there, and the release for the low back is just awesome! Start by sitting on the heels with the knees slightly wider than the hips. If having the knees wide aggravates the SPD pain, then keep the knees together and rest the head forward on the seat of a chair or on a pile of bolsters as shown in the photo.
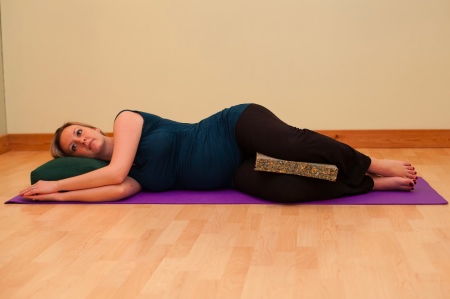
15. Savasana – Relaxation Pose
Ahhh the resting pose. During pregnancy, savasana is done in a side-lying position as being flat on your back is not recommended. Fold a blanket beneath you to provide extra cushioning. Place a foam block or folded blankets beneath your head (if your nose lines up with the center of your chest – your alignment is good). Finally, place a folded blanket or foam block between your knees – so that the upper knee is in line horizontally with the top hip. It is entirely possible, that there will be some days, especially later in the pregnancy, when this is the only posture that you are able to do. That is just fine. Taking time out to rest and restore your energy is one of the best things you can do for yourself and your baby.
Important Note: In addition to the yoga postures and exercises listed below, I also recommend you receive treatment from a physiotherapist, chiropractor or osteopath to deal with the misalignment and asymmetry happening in the joint. Find someone in your area who specializes in prenatal and postnatal work.
.
Essential Oils: If you are open to other alternative therapies, there are two essential oils that are very helpful. The first is frankincense. Yes,  the one that the wise men gave to baby Jesus. Frankincense is extremely good for inflammation. The second is an oil blend made by DoTerra called Deep Blue which includes wintergreen, camphor, peppermint, blue tansy, blue chamomile, helichrysum and osmanthus, all of which have analgesic properties in the oils’ chemical constituents. These are synergistically combined to provide relief from inflammation and its associated pain. You can simply and safely rub these two oils where it hurts and it will make a big difference fast.
Other Helpful Tips for Daily Living…
- Avoid moving your legs apart when you are lying down. When you are getting in and out of the car, bed or bathtub, take extra care to keep your knees together as much as possible. If you are lying down, pulling your knees up as far as you can stop your pelvis from moving and makes it easier to spread your legs apart comfortably. If you are sitting, try arching your back and sticking your chest out before parting or moving your legs.
- When you get dressed in the morning – make sure you sit down to put on your pants.
- This one is probably the most important: LISTEN TO YOUR BODY – listen to any pain… If something hurts, if possible, don’t do it. If the pain is allowed to flare up, it can take a long time to settle down again.
- Move often but focus on small movements.
- Listen for the subtle clues that you are aggravating the issue. Sometimes if you don’t pay attention during the day, you may not feel the effects of what you are doing until later in the day or after you lie down to go to sleep.
- When climbing stairs, take one step at a time. Step up onto one step with your best leg and then bring your other leg to meet it. Repeat with each step.
- When swimming, avoid breaststroke and take care with other strokes. The best movement for you in the water is to put water wings on your feet, tie your feet together and then use only your upper body to pull you through the water, either with a front crawl stroke or backstroke. You may look a little strange – but your body will feel better after.
- BIRTH – the best position for SPD for birthing is generally on all fours. The classic squatting position or semi-reclined position on your back with the knees up squat-like, these two positions can really aggravate the condition. If aggravated during birth, the SPD can persist for weeks after the baby is born. The all-fours birthing position keeps the knees more together and tends to feel the best during birthing for women with SPD.

Finally, I truly wish you all the best and if you have any other advice that worked for you, please let me know so I can include it.

Finally a big big thank you to Nicole from my Prenatal Yoga for volunteering to be the model for this post. And to Daunine McLauchlin who came to yoga despite her SPD and was brave enough to listen to her body and adapt the class to her needs (which does take some confidence in a group class) and who inspired me to do this post. Daunine is also a professional photographer which is why the photos are so nice. Please check out her work here.
If you liked this article you might also like reading these two blog posts.
Baby Led Yoga
This totally made me smile. Perhaps this is what our mom and baby yoga classes could be like if I let Markus teach the class for me. Enjoy! Keep Reading
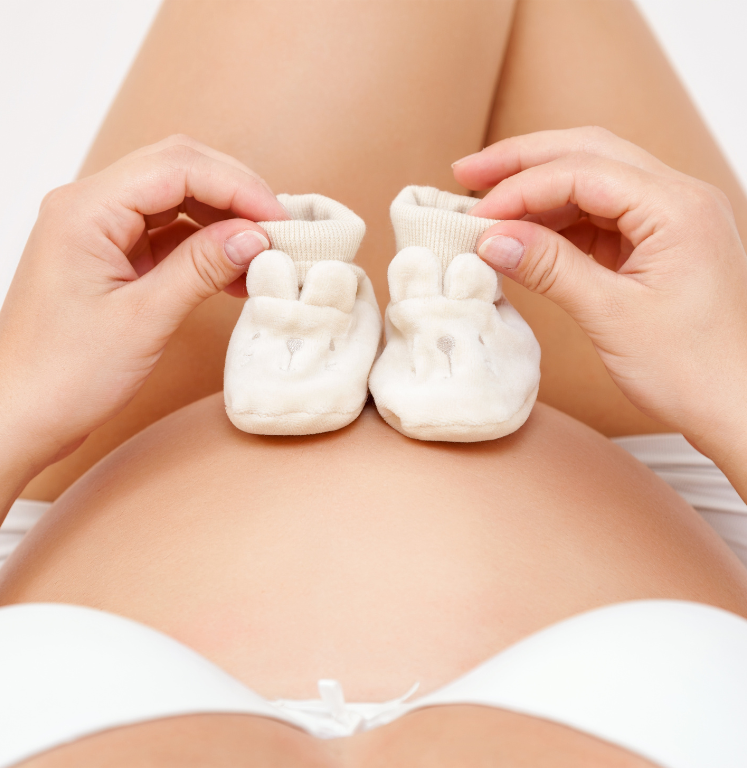
Are You Ready For Baby?

If you are close to your due date, chances are that someone or perhaps everyone seems to be asking you this question. But how really does anyone prepare for a new baby? Keep Reading
.
.


13 thoughts on “Yoga Poses and Exercises to Help Ease Pain from Pubic Symphysis Dysfunction”
Hi Marie,
I really admire your personal and engaging voice. I just wanted to say thank you for sharing such great advice and stories on your blog for expecting mothers! This article is especially helpful for pregnant women who experience discomfort.
I’ve taken a look through your website and we think you’ve done a fantastic job in covering topics that our brand’s audience of expecting mothers would be interested in reading. It would be great if you could join our community to feature your blog entries.
If you would like to learn more about this, please send an email to info at atomicreach.com.
Sincerely,
Tina
Has anyone tried these exercises and it worked?
Tailbone pain during pregnancy is also caused by relaxation of the ligaments in the pelvic floor, which does not necessary include Pubic Symphysis Dysfunction. In this case, using wedged chair cushions and leaning forward during sitting may help.
Reblogged this on Perennial Doula News and commented:
A good friend just texted asking what advise I have do deal with pubic joint inflammation known as pubic symphysis diastasis, where the bones of the pubic bone separate and misalign, creating a lot of pain that may increase through pregnancy as the baby grows. The following post at birthbliss.wordpress.com describes tips and yoga exercises to minimize your daily discomfort. If done consistently and carefully, the yoga poses described here will tone the pelvic muscles and uterine ligaments. While pregnancy hormones are acting on the joints and ligaments to loosen and relax the pelvis for birthing (which is a good thing), you can safely engage in toning exercises that will ease the discomforts of pregnancy and help your post pregnancy body resume healthy bone, muscle and organ alignment.
Thank you for sharing this or as we say here in Brazil ‘obrigada’ 🙂
Thank you so much for posting this information. This is my second pregnancy and the second time I’m experiencing SPD, I’m terrified because i cannot pick up my other child who is now a toddler and I’m having trouble working. Lots of doctors dismiss the condition as though it’s a mild discomfort when the pain is excruciating. I’m madly searching the net for any help i can get and this post looks like it’s exactly what i needed. Thanks again and really happy to know there is help out there and people who care.
I have psd, and a large baby (also a yoga certified yoga instructor). I am a normal weight according to BMI. I was surprised to see bridge pose in here with no modification, as I haven’t been able to do it without aggravating my condition for awhile, which for me also involved low back issues. I stack two blocks, put a bolster in front, sit on the bolster and scoot until my back is over the blocks in the right place. I let my shoulder blades come down to the floor and rest on the blocks, pushing the bloster out of the way with my foot. Before laying down I throw a yoga strap over the ankles with the two ends near where my hands will be. I walk my feet in, and come off the blocks while holding the straps, arms externally rotated. To come down, I just rest on the blocks, let go the strap, and carefully engage core as I remove one block at a time. My psd started early in pregnancy, and it has gone away on occasion with good chiropractic care, and careful yoga practice. Not doing too much is unfortunately important! The end of this pregnancy though the relaxin is kicking into high gear..
You should really spellcheck this. Some parts are hard to understand because of misspellings.
Hi Yuki! Thanks for your feedback. I think I’ve fixed them now. I know it’s not easy to read about a yoga pose and then do it. In the next couple months, I’ll be adding a video to go along with this post.
This article helped me so much! As a yoga teacher myself, I have spent some time on the mat lately, without any of these modified postures coming to mind. You have really made my pregnancy easier by creating this sequence. I’ve become a little stronger since practicing, and I believe the pain is going to be alleviated long term if I practice these daily! I’m excited to pass on the information to other women, and to continue reading your blog. I have just found out that I am pregnant (#3), so teaching other women to have a save pregnancy is really important to me, again. I want to take your teachings and instruct some pregnancy classes too!
Hi Ellen!
Thanks so much for your kind words. I’m so glad that this sequence has been helping you and through sharing sharing it with other’s you’ll help other woman feel better in their pregnant bodies too.
And CONGRATS on Baby #3 coming along… I found that our third (our bonus baby) was the easiest to add into our lives – I was really worried about that when I found out that the little people were going to outnumber my husband and I – I worried it would all be too much. But actually he just slid right in there and has been a joy ever since. I hope your third child blesses your family just as much.
And ps!
here are two more ways I can help…
1. Get free access to the Roadmap to a Peaceful Pregnancy
Stress and worry can suck the joy right out of being pregnant. Learn how to release these difficult emotions quickly and effectively, and then let your wellbeing soar . — http://bit.ly/pregnancypeace
2. Join my free FB group, The Holistic Bump
This is THE community to connect with other pregnant women who are looking to enhance their pregnancy using holistic mind-body tools. — http://bit.ly/holistic_pregnancy